
Pears.. that's it.. Okay so maybe this doesn't seem exciting to you but....here is how I made them.
Supplies:
A light bulb- burnt out or new-
Some rope, twine, yarn or just something with texture
Glue gun
stick from the yard
Instructions:
Take the light bulb put a dollop of glue on the bottom and start winding the rope around the bottom til you reach the top. Don't cut right at the end....your pear needs a stem. Add your stem. Wrap a bit of the rope around the base of your stem and you are done....
You could spray them with adhesive spray and glitter them up. Oh lots of glitter! Or roll them in epsom salts...
Thursday, December 8, 2011
Stocking Holders - December 2011
Here's the how to on the stocking holders... As I had said I went neutral with mine so I could reuse it in the kitchen as a recipe holder....however I may change my mind.. I love the neutral but not so much on my mantle right now... So lets see!
Supply list:
two- 2 x 6 boards cut at 9" each (if you are using the metal plate)(( however you can make them smaller add a piece of glass held in by screws on the top bottom and sides. ))
A finial or not for the top
A drawer pull for the front or a hook
A piece of galvanized metal. I found these in the plumbing section of HD. I will go back and get a more definitive title..
The metal already has 6 holes in it so you will need 6 -1/2" screws.
Wood glue - you know I love liquid nail or gorilla wood glue
Instructions:


Have Home Depot or Lowes cut your board for you. Remember the cut bin in the back of HD, usually you can find 2x6s for 51 cents!
Find the center of your bottom piece and make it. I used a nail to help hold the knob on so I wouldn't have to hold it.
Glue your top piece on about in the middle of your bottom piece.
Let it dry.
I suggest drilling a hole in the top for the finial but if you don't have a drill use a nail to at least start the hole.
Glue on your knob and your finial.
Paint.
Now add your metal plate and you are done!

Supply list:
two- 2 x 6 boards cut at 9" each (if you are using the metal plate)(( however you can make them smaller add a piece of glass held in by screws on the top bottom and sides. ))
A finial or not for the top
A drawer pull for the front or a hook
A piece of galvanized metal. I found these in the plumbing section of HD. I will go back and get a more definitive title..
The metal already has 6 holes in it so you will need 6 -1/2" screws.
Wood glue - you know I love liquid nail or gorilla wood glue
Instructions:


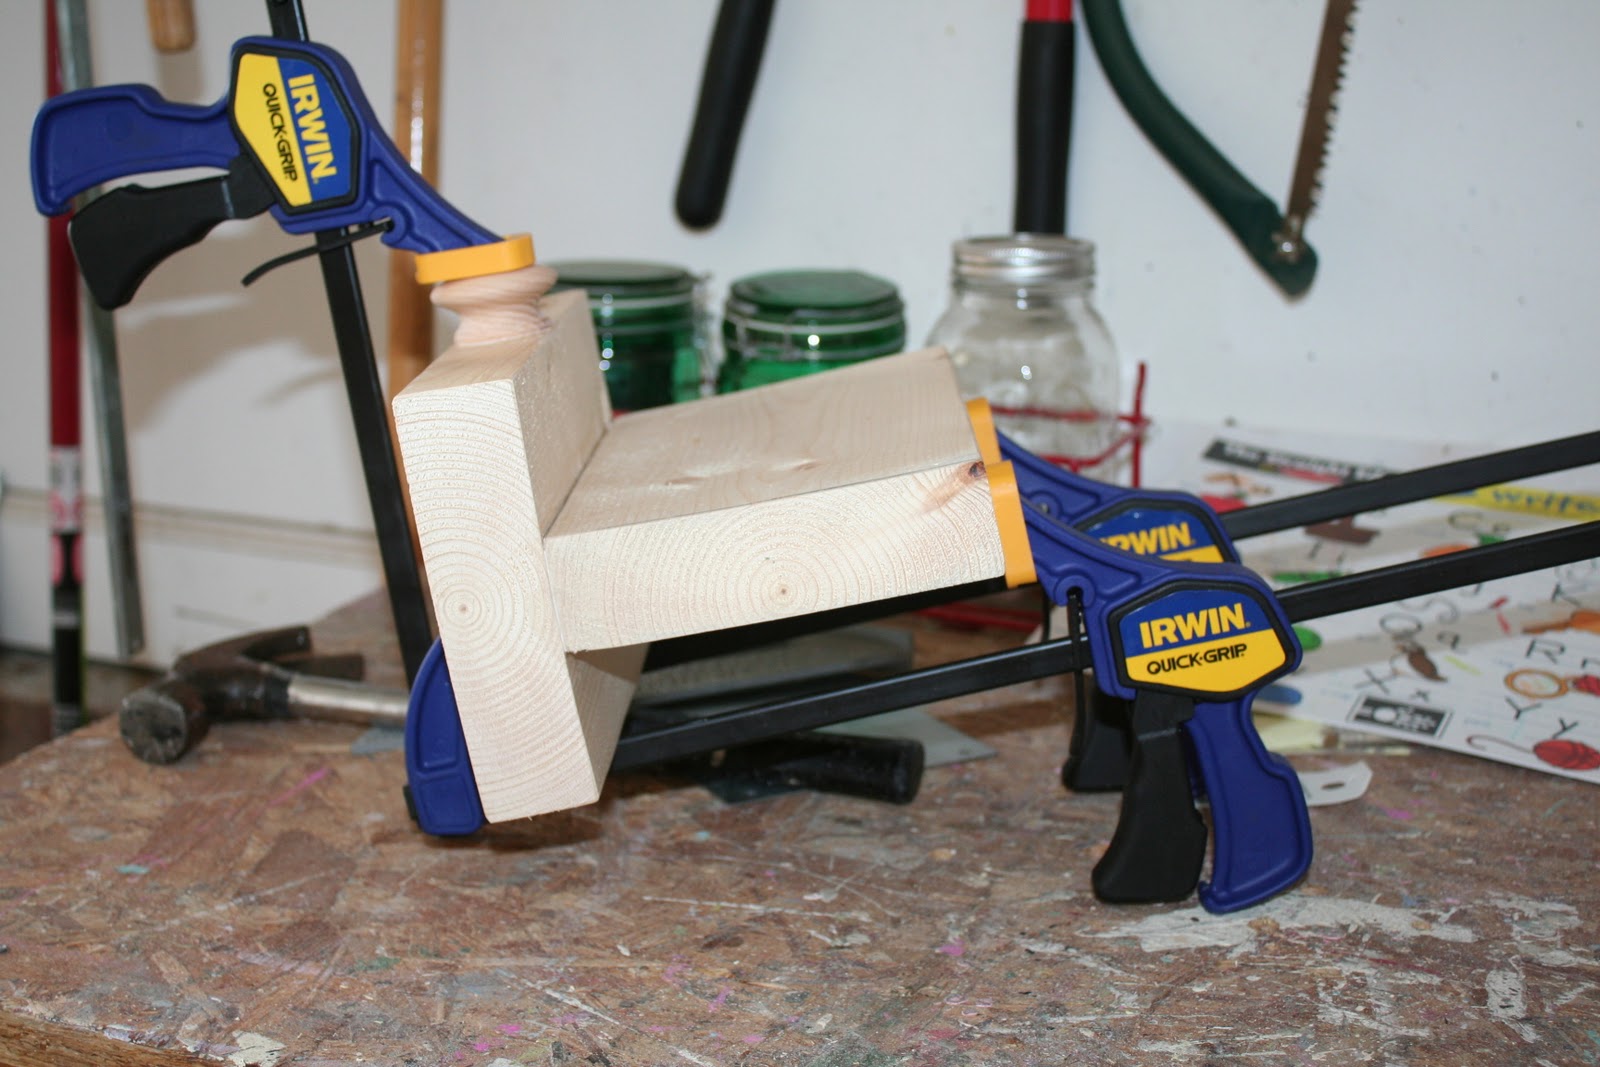 |
| I got new clamps! Oh the things that make me happy! :) |
Have Home Depot or Lowes cut your board for you. Remember the cut bin in the back of HD, usually you can find 2x6s for 51 cents!
Find the center of your bottom piece and make it. I used a nail to help hold the knob on so I wouldn't have to hold it.
Glue your top piece on about in the middle of your bottom piece.
Let it dry.
I suggest drilling a hole in the top for the finial but if you don't have a drill use a nail to at least start the hole.
Glue on your knob and your finial.
Paint.
Now add your metal plate and you are done!

Monday, November 7, 2011
Wall Sconces!! I love these!!!!
I love all the projects I do but this one I really really love! Its part of my holiday decor (pictures to come later!). I love getting somewhat of a head start on holiday decor! Anyway enough about that, now to the HOW?
 |
| Here are your supplies: 1- 2x6 cut at 24", 1-2x6 cut at 4" and a finial. |
You will need something to hang it with, sawtooth hanger or wire and screws. AND you need something to put on it! No direction from me there, that's all you! Unless you want to do the rubber band spray painted vase seen below!
 |
| You will glue the 4" piece approximately 7" up from the bottom. You can use a nail to start the hole for the finial to make it easier to screw in later, do that before gluing the piece on.... To do that, just nail the nail in part way, and pull it out. To make the shelf more secure add two 2" deck screws to the back... |

Dryer Vent WHAT???? Pumpkins -yes in deed!
I know this is stretching it! (pun intended!) But seriously look at these pumpkins made from dryer vents! HOW?


 |
| Start here! |
 |
| Cut approximately 37 "ribs" ( I found that to be the easiest number to work with) |
 |
| Make a circle.... |
 |
| Hot glue the circle together. I used clothes pin to hold it together. The metal may get hot... |
Monday, March 7, 2011
March 2011- The $10 Mirror!!!!
Details are coming! Here are two mirrors I have made so far!
 |
| This mirror cost me $4.12 for the scroll at the top, $5.98 for the mirror - 10% discount at Lowes and Home Depot. The wood came from a building that was torn down, so it was FREE! = $9 |
 |
| This mirror cost me: $7.70 for the fence post, $4 for the mirror, $ 4.12 for the scroll = $15.82! |
Saturday, January 29, 2011
APOTHECARIES Jars! Just a fancy way of saying a vase with something glued to the bottom!
Okay ladies, hopefully you have made your way over to: Just a woman and a wheel! February's Titus 2, rocked as usual! If you haven't made it to one yet, please come. Okay so back to my part, the last part, the craft part!!!
Here's what you need:

Here's what you need:
- Glass vase/jar, any size, any shape, any style, remember the mason jar full of beans, from anywhere...
- Something to give it height...hmmmm what to put as options....glass candlestick holders, wooden candlestick holders, votive holders, martini glasses, ice cream bowls and if you are lucky enough to have someone give you fence finials use them!***my one disclosure about your "bottom" choices*** just like a good pair of jeans, make sure your bottom fits! Not the bottom of the vase but the weight of the vase. If you put a big ole vase on a small holder, it will tip over and probably break!
- I recommend E6000 glue, you can get it at Walmart or Michaels/ACMoore
You like pictionary? Here's how I give directions...
 |
| Picked up 2 glass candleholders, they were only 50 cents NOT $1.29! |

| I put the glue around the lip of the top, not too much so you don't have clumps around the end, turned one upside down and put it on top of the other one! |
 |
| Here is the glass vase I placed on top! J'aime les magasins à un dollar, yes that's right a dollar store vase!!!! Viola an apothecary jar!!!! |
 |
| What's the Bling??? I used curtain rings and scrapbooking letters!!! Oh yeah and some 1.5" satin ribbon! |
January 2011 Magazine Holders!
Here is the one project- I could NOT do! But don't let that discourage you from trying. Three things I can't do: Bake/decorate cakes, make homemade biscuits and gift wrap! This is very much so like wrapping a gift, which should have been my first inkling- I couldn't do it. So rather than post a picture, here's the link to the ones done right!
The only addition I made to mine, was a little "bling". I add a fender washer (not sure what its for- a car or an appliance -but Ace Hardware has them!) I tied a ribbon through the hole and glued it to the front of the holder!!
Click this link! Way better than mine!- Magazine Holders!
The only addition I made to mine, was a little "bling". I add a fender washer (not sure what its for- a car or an appliance -but Ace Hardware has them!) I tied a ribbon through the hole and glued it to the front of the holder!!
Click this link! Way better than mine!- Magazine Holders!
Subscribe to:
Posts (Atom)